How to Organize a Repair Shop Without Losing Customer Items
Every repair shop owner knows the sudden spike of adrenaline when a customer walks up to the counter, hands over their claim receipt, and the item isn’t where it’s supposed to be.
You check the active work benches. You check the completed shelf. You look under tables. Five minutes pass. Ten minutes pass. The customer is tapping their foot, and your clerk is sweating. Eventually, you find it - tucked behind a pile of winter coats or inside an unmarked box - but the damage is done. Your shop looks disorganized, your customer is frustrated, and you’ve wasted valuable labor hours digging through clutter.
Whether you run a shoe repair, watch repair, electronics repair, or tailoring storefront, losing track of customer-owned property is one of the most expensive leaks in your business.
In this guide, we will break down the physical and digital organization strategies needed to make your repair shop “lost-proof.”
Table of Contents
- The Real Cost of Misplaced Customer Items
- Why Traditional Systems Fail
- The Three Pillars of a Lost-Proof Repair Shop
- Storage Grid Architectures by Niche
- Step-by-Step: Setting Up a Physical Grid System
- Managing Unclaimed Property and Liability
- The Digital Handover: Eliminating the Search Bottleneck
- Frequently Asked Questions
The Real Cost of Misplaced Customer Items
Misplaced customer items cost repair shops thousands of dollars annually in direct replacement costs, wasted labor, and negative online reviews.
When an item goes missing, most owners only calculate the direct cost: the price of replacing the customer’s shoes, device, or garment. But the true cost of organizational chaos runs much deeper:
- Labor Drain: If your staff spends just 10 minutes a day searching for misplaced tickets or items, that adds up to 5 hours of wasted labor per month. At $25/hour, that’s $1,500 wasted annually just looking for things.
- Reputational Damage: A customer who has to wait 15 minutes at checkout won’t recommend you. Worse, they might leave a 1-star Google Review. In local business, positive review velocity directly dictates your search ranking.
- Stress & Burnout: Constant chaos behind the counter wears down employees and owners, leading to employee turnover and errors.
Why Traditional Systems Fail
Traditional repair shop tracking systems fail because they rely on paper logs, static spreadsheets, or bloated point-of-sale suites that lack coordinate mapping and automated alerts.
Most local repair shops still rely on three systems that are virtually guaranteed to fail as volume scales:
1. Carbon-Copy Paper Tickets
Paper tickets have been the standard for decades, but they don’t hold up in a busy workshop. They get stained with glue or grease on the bench, the handwriting is often unreadable, and if a ticket falls off the item, you are left with a mystery package.
2. The “Alphabetical Racks” Myth
Many shops organize finished items by the customer’s last name. This sounds simple but breaks down constantly. Misspellings at intake, hyphenated names, and foreign names create sorting confusion. If a customer named “Smith-Jones” has their item placed under “S” but the clerk searches under “J,” it is effectively lost.
3. Desktop POS Overload
Many stores buy massive, expensive Point-of-Sale (POS) suites designed for large franchise dry cleaners or retail chains. These systems are bloated, require days of employee training, and focus on barcode inventory rather than simple bench workflows and shelf organization.
The Three Pillars of a Lost-Proof Repair Shop
A lost-proof repair shop runs on three core pillars: standardized digital check-in, physical-to-digital location mapping, and status-triggered automated alerts.
To build an organization system that scales effortlessly, you must treat your shop as a miniature fulfillment center. This requires three core operational rules:
graph TD
    A["1. Standardized Digital Intake"] -->|Generates Reference ID| B["2. Physical-to-Digital Grid Mapping"]
    B -->|Assigns Grid Slot| C["3. Status-Triggered Handovers"]
    C -->|Sends Automated SMS & PIN| D["Fast Counter Checkout"]
Pillar 1: Standardized Digital Intake
The moment an item crosses your counter, you must capture three things digitally:
- Clear Customer Identifiers: A verified phone number and spelling-confirmed name (utilizing system tools to prevent spelling mismatches).
- Explicit Item Descriptors: Instead of writing “boots,” log “Womens brown leather Chelsea boots, size 8, worn heel.”
- Unique Reference ID: A digital order code that connects all updates to that specific item.
Pillar 2: Physical-to-Digital Grid Mapping
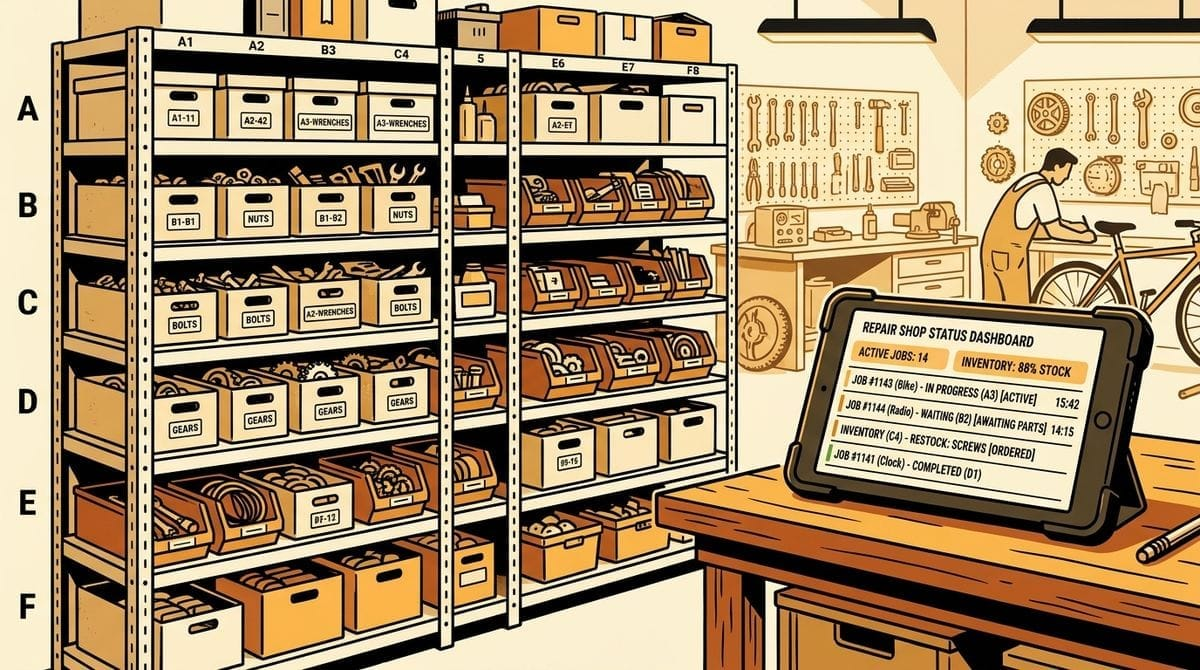
You should never put a finished item on a shelf without logging its exact location. Every shelf, drawer, bin, and hanger rail segment must have a coordinate code (e.g., Shelf B-2, Bin 14, Rack A-3). This physical code must be pinned to the digital ticket before the item is filed away.
Pillar 3: Status-Triggered Handovers
Your queue must follow a strict status progression:
- To Do: Awaiting technician diagnostic/work.
- In Progress: Currently on the workbench.
- Done: Completed, placed in its mapped grid slot, and ready for pickup.
- Collected: Checked out and handed back to the customer.
When the ticket transitions from In Progress to Done, the system should trigger an automated text alert letting the customer know the item is ready, along with a secure pickup PIN verification code to ensure secure checkout.
Storage Grid Architectures by Niche
Different repair niches require distinct physical layout grids to handle their specific item profiles and secure storage needs.
When designing your physical storage coordinates, customize the layout to fit your industry’s specific items:
Shoe & Leather Repair
- Item Profile: Varied boxes, large leather bags, bulky boots.
- Grid Setup: Open wooden shelving divided into square pigeonhole units.
- Coordinates: Label vertical columns with letters and horizontal rows with numbers (e.g.,
Shelf B-4). For boots that must hang, label individual hanger hook slots (e.g.,Hook 12).
Watch & Jewelry Repair
- Item Profile: High-value, extremely small items.
- Grid Setup: Security drawers inside a fireproof safe, or padded plastic organizers.
- Coordinates: Use safe drawer letters mapped to divided bin rows (e.g.,
Safe Drawer C, Slot 12orSafe C-12). For a detailed breakdown of secure safe tracking and movement calibration notes, read our guide on watch repair software.
Electronics & Device Repair
- Item Profile: Fragile glass screens, sensitive circuit boards, loose accessories (chargers/cases).
- Grid Setup: Static-dissipative (ESD) plastic bins on industrial wire racks.
- Coordinates: Assign one bin per order. Label the bin with a bold, high-contrast grid coordinate (e.g.,
Bin E-104).
Tailoring & Garment Alterations
- Item Profile: Delicate fabrics, long dresses, suits, coats.
- Grid Setup: Continuous hanger rails partitioned with heavy-duty plastic index dividers.
- Coordinates: Label rail segments by rack section and number ranges (e.g.,
Rail A, Slot 15orRail A-15).
Auto Repair Shops
- Item Profile: Heavy vehicles parked in lot spots, vehicle key fobs.
- Grid Setup: Numbered key cabinets paired with mapped parking lot rows.
- Coordinates: Map fobs to specific pegs and cars to lot spots (e.g.,
Hook 12, Lot B-4). To learn how to organize vehicle service bays, see our guide on auto repair workflow.
Step-by-Step: Setting Up a Physical Grid System
You can organize your entire repair shop backroom in a single weekend by dividing your space into zones, labeling coordinates, and linking physical tags to digital tickets.
| Step | Action | Best Practices |
|---|---|---|
| 1. Segment Your Storage | Divide your backroom shelves into labeled zones. | Zone A: Completed orders, Zone B: Work-in-progress, Zone C: Rush orders. |
| 2. Label Coordinates | Affix bold, clear labels to every rack, shelf slot, or bin. | Use a standard Letter-Number format (e.g., A-1, A-2, B-1). |
| 3. Establish intake tags | Attach a heavy-duty cardstock tag to the item during intake. | The tag should display the digital ticket reference number clearly. |
| 4. Map at Completion | When a repair is done, put it in the grid slot and update the dashboard. | Log the location coordinate immediately. Never say, “I’ll log it later.” |
Managing Unclaimed Property and Liability
Repair shops can legally protect themselves from the liability of abandoned items by displaying clear policy disclosures, sending multiple automated reminders, and adhering to local storage laws.
Every shop has a subset of customers who leave their completed repairs on your shelves for months - sometimes years. This “dead inventory” clogs your storage grid and creates insurance liability:
- Clear Consent Disclosures: Include a strict storage policy on your intake screen or receipt. In Ontario, for example, the Repair and Storage Liens Act (RSLA) governs when you can sell or dispose of abandoned goods to recover repair costs.
- Automated Reminder Escalation: Don’t rely on manual follow-up calls. Use automated text alerts to notify customers at day 1 (Ready), day 14 (Friendly Reminder), and day 30 (Final Notice).
- Digital Audit Trail: By maintaining a digital log of every automated notification sent, you establish a legally defensible audit trail proving that you made reasonable attempts to contact the owner before declaring the item abandoned.
The Digital Handover: Eliminating the Search Bottleneck
The digital checkout process eliminates front-desk search bottlenecks by matching the customer’s ticket instantly to a logged physical coordinate.
Once your physical shelves are mapped to digital coordinates, checkout becomes seamless.
When a customer walks in to pick up their item:
- Search the Customer: Enter their name, phone, or ticket reference into your dashboard.
- Read the Coordinate: The dashboard instantly tells you the location (e.g.,
Rack B-4). - Retrieve & Verify: Walk straight to
Rack B-4, grab the item, and verify the customer’s identity using their secure 4-digit pickup PIN.
By replacing the “search hunt” with direct shelf retrieval, you can reduce average customer wait times from 3 minutes to under 15 seconds.
Frequently Asked Questions
What if my staff puts an item in the wrong shelf slot?
Human error happens. However, because you attach a physical tag with the unique reference ID to the item, a quick visual sweep of the shelf zone will resolve the issue. Enforcing a strict “log coordinates instantly” policy during completed status updates reduces this error rate to near zero.
Do I need barcode scanners for shelf tracking?
No. Barcode systems require extra hardware, printing ribbons, and scan triggers, which add points of failure. Simply typing or selecting a text coordinate (like B-2) on a tablet or phone is faster, cheaper, and more reliable for local shops.
How do we handle oversized items that don’t fit in grid slots?
Designate a specific open floor area as “Zone O” (Oversized) and divide it into numbered floor squares. You can then map items to coordinates like Floor O-3 exactly like you would for shelves.
Bring Order to Your Repair Bench
If you want to transition your repair shop from paper slips and backroom clutter to a fast, professional operation, Shelvdon is built specifically for you.
Shelvdon combines simple digital check-ins, physical shelf location tracking, and automated text alerts with secure pickup PINs in one easy-to-use B2B platform. No spreadsheets, no clutter, no lost items.